A Neural Algorithm of Artistic Style
之前的几篇文章是用GAN技术来生成不同风格的艺术图片,GAN本身是一个比较大的方向,生成风格图片只是一个应用而已。最近读的两篇paper来自同一个作者Gatys的文章,一个15年A Neural Algorithm of Artistic Style,一个16年Image Style Transfer Using Convolutional Neural Networks(中了CVPR)读完感受是基本讲述的是一个内容,可能16在15的基础上的升华吧。本篇只要针对第一篇paper,其实并没有差很多。
上一张自己实现的效果图。content picture
style picture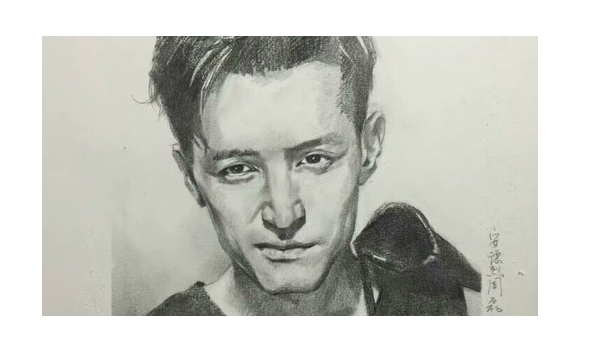
idea
文章的思想还是比较简单的,用几个关键词来概括:texture transfer,artistic style,separating content fron style,convolutional neural networks。用中文组合一下就是对艺术风格的图片进行纹理迁移,思想支撑是一张图片用convilutional networks(卷积网络)可以做到内容和风格的分离。
the paper tells
作者花了一部分的笔墨来说convolutional networks的一些优势:convolutional networks在feed-forward能够通过层级结构的computational units来处理图像信息。每层的units可以理解为图片滤波器对输入图片进行特征抽取(feature maps),不同层滤波抽取到的feature maps也不一样。在学习图片feature maps过程中,随着层数加深,学习到的feature maps更加清晰,直接。换句话来说,不断的抽取使得深层学习到的是图片的content,而不是具体的pixel values。为了验证,可以通过reconstruction技术可视化学习到的feature maps。
content representation and style representation
- 刚才说到low layers计算的feature maps得到的更多是pixel values,所以在content feature 一般选用的是high layers 的feature response作为content representation。
- style representation采用的是抓住texture信息的方法。这里可以简单认为把握风格图的纹理信息等于风格信息,主要是通过不同层得到filter response间的相关性,在计算style loss的时候可以看出。
filter images at each processing stags
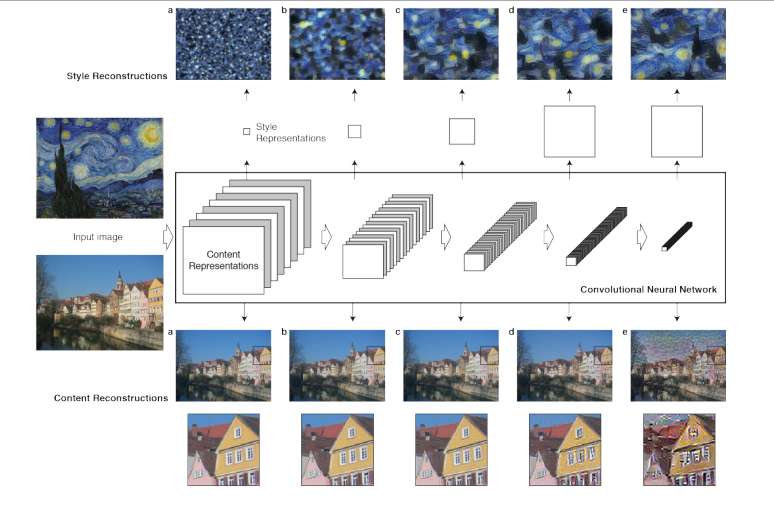
可以看到对于content representation,high layer可能会丢失pixl values但是轮廓依然在。对于style representation 学习到的纹理随着层数更加具体,清晰。
loss funciton
content loss
- 其中p,x分别表示original image和generated image,P,F表示对应的filter responses,i表示第几个filter,l表示第几层,这个loss还是很好理解的。有关correlations的知识可参考这里
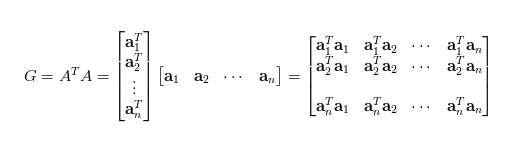
- 关于Gram矩阵的理解:看作是feature之间的偏心协方差矩阵(没有减去均值),在feature map之中,每个数字都是特定滤波器在特定位置的卷积,每个数字代表特征的强度,Gram计算的是两两特征之间的相关性(那两个同时出现,谁与谁此消彼长)Gram对角线元素还体现了每个特征在图像中出现的量。所以Gram有助于把握整个图像的大体风格,有了Gram matrix,可度量图像风格的差异。
- 关于Gram的运算
style loss
主要基于不同filter response的相关性。feature的相关性用的是Gram matrix来衡量。主要操作是vectorised feature map的内积操作。
每一层的style loss可表示为
the total loss
a,x分别original,generated image,$A$,$G$为各自的style representation。
total loss
content和style是一对trad off过程,生成图片偏向于content,会使得style的效果没那么理想,反之亦然,因此在训练过程中可以控制$\alpha$,$\beta$来控制content和style之间的权衡。
trad off result

- 行表示trad off比率,生成图像更倾向于style还是content。
- 列表示在不同layer的效果,style representation和layer的关系。
problems
综合自己的生成的风格迁移图来说,素描有太多细节无法在生成,而且生成画质较差。论文里出现好的效果使用了抽象派的艺术照,油画等,这种类型效果会比较好,容易学习纹理特征。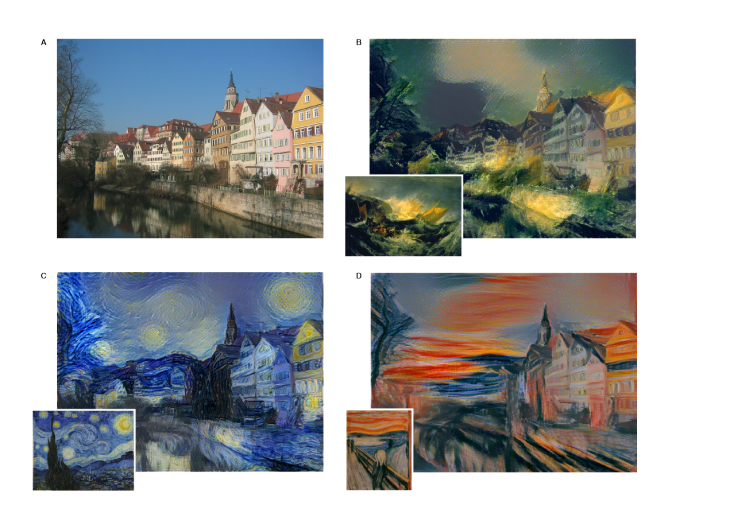
code
主要复现论文,采用的是pytorch里面的VGG19预训练模型,使用的convolutional layers有‘0’,‘5’,‘10’,‘19’,‘28’。
1 | #encoding=utf-8 |